SELC Fabrics
  • Home
  • Long Arm Quilting
  • Courses
  • Judging
  • Blog
  • About & Contact

Deconstructed Screen Printing

2/15/2012

0 Comments

 
Picture
I had a couple of friends over to play with deconstructed screen printing last weekend.  While I had once made a screen print with white school glue I had not, done deconstructed screen printing before.  Oh what fun.  The possibilities are endless.  Deconstructed screen printing is a technique of screen printing where you make a design on the screen using thickened dyes. (We added MX dyes to sodium alginate.) You let those dyes dry on the screen.  Then you pull either clear alginate (no dye added), or the thickened dyes across the screen to print it. Sometimes the dried dyes act as a resist, and you print the open area of the screen.  However, after a short time the dried dyes start to break down and print as well.  It is pretty cool.  I have pictures to show you...

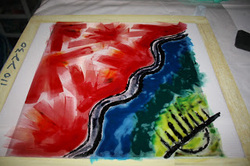
Ok, here is my first screen (to right).  I used a paint brush to paint this simple design.  The black was very clumping and didn't spread even.  I wanted to leave the visible brush strokes in the red to see how they would print out.  Here is how they printed.

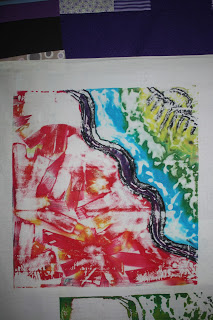
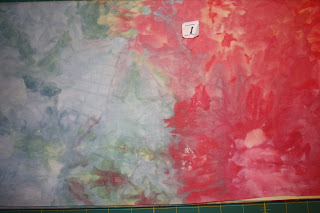
Print #1 (below, left), I used the clear alginate so the original colors would show.  I had to let the alginate sit on the screen for a while to release the dried dyes.

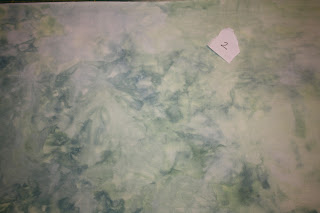
Print #2 (below, right) didn't come out quite as nice as the first.  Again I used the clear alginate, but just pulled it across the screen twice and didn't let it sit on the screen.

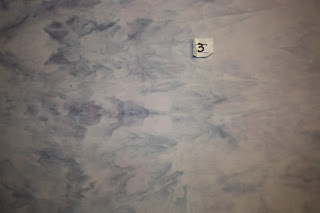
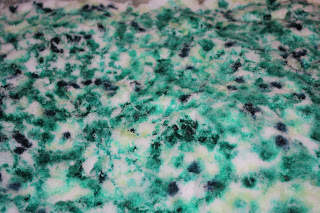
Print # 3 (below, left), I used a green thickened dye.  You can see where there is still dye dried to the screen.
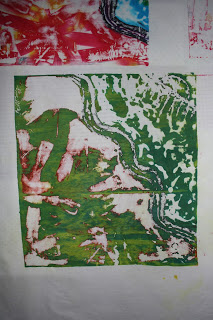
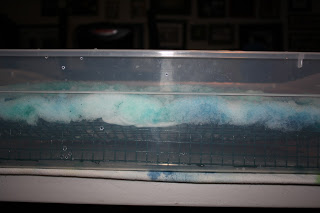
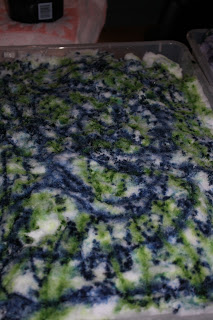
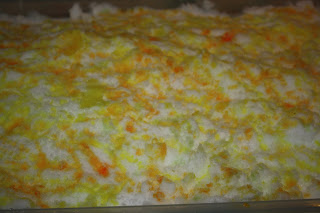
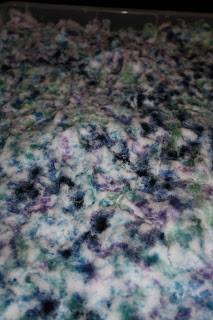
In print #4 (above, right) I pulled yellow through the screen.  Being new to this, I stopped after this print and washed the screen.  After doing the second screen, I think I could have still gotten more prints out of this screen.  Too bad I washed!  Below is screen #2 followed by the prints that I made from it.  I made this screen by laying cut fruit and vegetables down on the table and then pulling green and blue dye over them.  Where the fruit and vegetables touched the screen, the dye was resisted and left open space (mostly).  I put green on one side of the screen and blue on the other.  I did like the effect of the color difference on the prints.
Picture


Here is the screen as the
thickened dye is drying. 
You can see the green pepper
clearly.  There are oranges,
mushrooms, apples and
kale there also.

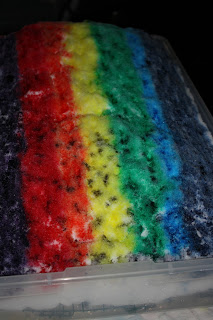
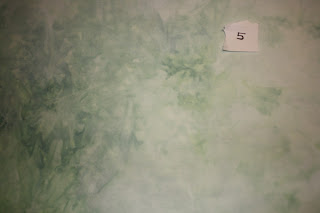
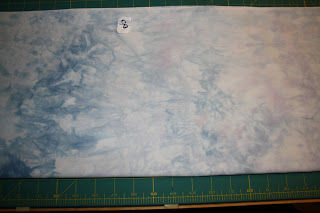
Below are the last set of prints that I got from the screen.  The different colored sides shows through no matter whether I use clear or colored alginate.  The last few screens I used a clear alginate.  It was cool how residual colors from prior prints come out in these prints.
Picture
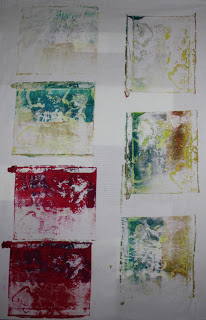
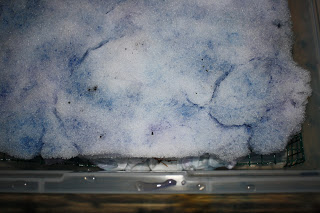
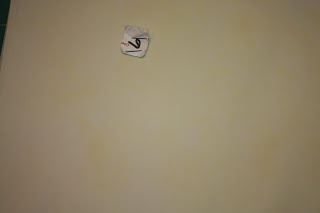
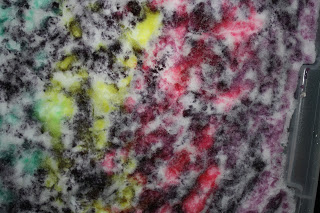
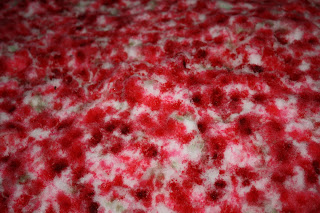
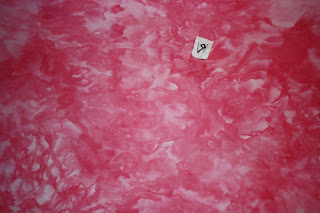
And below are the first prints from the screen... I used clear alginate for most of them.  Obvouisly I used red in the one... and dropped a glob. The one in the bottom left corner, I used yellow.  The yellow one show a bit more detail then the others.
Picture
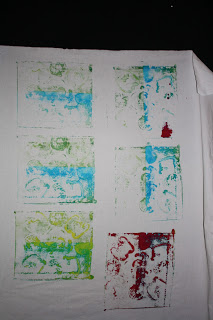
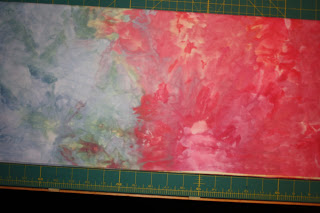
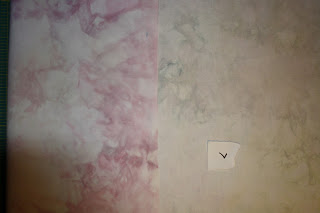
Below are the middle set of prints from screen #2.  After using the red, I switched back to the clear alginate.  However there was some residual red that shows through the next several prints.
Picture
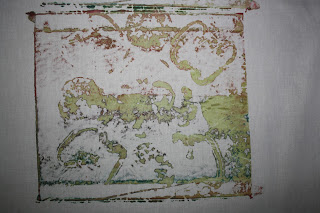
Here a couple close-ups of the prints from screen #2:
I did have left over thickened dyes and clear alginate and made up two more screens, so I might have more to show you at another time! Thanks for letting me share my work.
0 Comments

Dyeing: Washing SodA vs. pH Increaser

2/9/2012

0 Comments

 
results from washing soda vs. pH increaser
Here are the results of my experiment with washing soda vs. pH increaser (pool supply). I have heard for years that you should not use washing soda when dyeing, I have been using since I started 1995.  I have always thought that I was getting wonderful results.  The reason I started using washing soda in my dyeing was my husband worked for the "Arm & Hammer" company at their main production facility in Green River,  WY.  At that point in time, the boxes that didn't glue properly were set by the door for the employees to take home.  Free supplies, not going to turn that down.  Anyhow, when I first started the "rumors" in the dyeing world were that washing soda contains perfumes and other additives.  After talking to the chemical engineers at the plant, I learned that was not true.  Lately, I have been hearing that because they spray the sodium carbonate with water before grinding into a powder, it is less effective.

After hearing taking a class with Carol Soderlund (whose knowledge I greatly respect), I came home to run some experiments.  I labeled three small pieces of fabric: dye supply, pool, and washing.  I mixed up three gallons for dye activator using the same quantities: 1/2 of sodium carbonate to a galloon of water.  One container consisted of the sodium carbonate purchased from a dye supplier, one from pH increaser from a pool supply place, and the last one from a box of washing soda (Arm & Hammer).  Put all three samples in the same amount of dye stock (brown), used the same amount of dye activator, and they all batched the same amount of time.  The results were very similiar. 

Recently, I had some problems with excessive run-off/bleeding, especially with turquoise.  Now I realize that turquoise is a problem child that needs warm temperatures and longer batch times.  I wanted to re-test the sodium carbonate, using turquoise this time.  Above are my results, they are very similiar.  The mottling makes it a little more difficult to critically compare them.  If you are wondering why I didn't use the third source of sodium carbonate, there are a couple of reasons.  A recent bad experience, remember the excessive run-off I mentioned earlier.  I have a feeling it was from a bad batch of sodium carbonate from a dye supplier.  I had been using up the leftover little packets of soduim carbonate that had come in dye kits I had ordered for a class I had taught.  After talking with several friends over the sudden problem, one of them mentioned that there had been a "bad batch" put out a couple of years before.  I dumped all the sodium carbonate in my container (the little packets had mixed with other carbonate that I keep in a container) and started fresh.  The problem dissappeared.  Second reason, why pay for shipping cost when their are local sources.  I encourage you to try the experiment.  A box of washing soda is less than $5.  Compare that to pH increaser or sodium carbonate from a dye suppier.  Give it a try.

0 Comments

Snow Dyeing: Before & After

2/1/2012

0 Comments

 
I just thought I would share some before and after photos of my snow dyeing.  I like the look of snow dyed fabric, Monet-like.   In light colors, it reminds me of marble.  I think it makes a great background fabric.  When I snow dye, I place wet soda soaked fabric (recipe: 1/2 cup soda ash to a gallon of water) on top of a rack or screen, inside of a tub.  The purpose of the rack or screen is to hold the fabric off the bottom of the tub. The purpose of the tub is to collect all the water from the melting snow.  I currently like using plastic storage containers with either a bakers rack on top of 4 oz plastic containers, a thin metal fencing cut and bent to fit inside the storage container or screening suspended inside of the storage container using binder clips to hold it around the sides.  Here are a few pictures from during the process so that you can see how I set up the racks and stuff...
After placing the soda soaked fabric on the rack, I shovel and pack about 3 inches of snow on top.  Add your dyes on top of the snow, like making a snow cone.  Then watch the snow melt.   A couple of things to keep in mind with snow dyeing:
  • Snow melts around the edges first, and some times the color seems to wick to the center. 
  • I recommend checking the fabric during the process. 
  • If you see the edges peeking out from under the snow without much color, move some colored snow from the center out to the edges.

Below are the before and after photos of tub #1, rainbow stripes of color, full strength (5% solution).  I sprinkled a little bit of gray at one end to see if it would make a noticeable difference.  The resulting fabric is below: In the second photo of the fabric, you can see some markings from the rack.  While the picture doesn't show the entire piece, the colors at each end are similar to what is shown.  The gray end is not that noticeable in this fabric.
Below is tub #2 before and after. In tub 2, I used blue (full strength), light blue (watered down), green and sprinkled a light orange over the entire piece. 
Tub #3 (below) I used blue, lt blue, gray, pink, and purple.
Tub #4 (below) is pale (really watered down) orange, pink, Lt green, lt blue, gray and pale green.
Tub #5 (below) is green, It green and teal.
Tub #6 (below) is Lt yellow, lt gold, and a sprinkle of lt green.
Tub #7 (below) is gray, lt blue, lt green, lt yellow, pink and lt purple.
Tub #8 (below) is teal, lt blue, blue, lt teal, and lt purple.
Tub #9 (below) is Pink, Red, dk red (red with a little black added), lt green, lt yellow.  By adding a complimentary color, I was hoping for some neutral/tan-brownish areas.
Tub #10 (below) are leftovers... blue, teal, green, yellow, pink, heavy sprinkling of gray.
As you can probably tell, I mix by eye and don't use recipes much.  So when I list the color itself (ie, blue), that means I used it straight out the dye stock (5% solution).  If it said, light "color" or pink, it was watered down some.  I didn't not measure.  Guessing from the 4 oz cups that I mix in, 1 oz of dye stock to 2-3 oz of water.  Pale meant even more watered down... using some "light" dye and adding more water.
0 Comments

    Helpful Hints:

    I love using leader/ enders when I am chain piecing.  It was an idea from Bonnie Hunter.  Instead of using a scrap piece of material in between chains, use two small blocks.  You can work on two project projects at once!  I keep a pile of 2" scrap squares next to my machine for this reason...Happy piecing!


    Archives

    February 2020
    December 2017
    March 2017
    February 2017
    January 2017
    July 2016
    February 2016
    November 2015
    September 2015
    August 2015
    July 2015
    June 2015
    May 2015
    December 2014
    October 2014
    July 2014
    May 2014
    March 2014
    February 2014
    January 2014
    December 2013
    July 2013
    May 2013
    February 2013
    February 2012
    January 2012


    RSS Feed


    Resources:

    Pro Chem
    Dharma Trading

    West MI Quilt Guild
    National Quilting Association
    American Quilter's Society
    Surface Design Association
    International Machine Quilter's Association, Inc
    Modern Quilt Guild

    Some of TEACHERS I HAVE LEARNED FROM:

    • Lyric Kinard
    • Susan Brubaker Knapp
    • Nancy Crow
    • Carol Soderlund
    • Caryl Bryer Fallert Gentry
    • Anita Shackelford
    • Esterita Austin
    • Ruth McDowell
    • Frieda Anderson
    • Susan Cleveland
    • Karen Kay Buckley
    • Ann Johnston
    • David Hornung


© 2014-2018 SELC Fabrics, LLC.  All Rights Reserved. | Privacy Policy
Notice: All images and materials on this site are protected by copyright law and may not be reproduced in whole or in part without the express written permission of Sue Cortese. Links to external sites and mentions of commercial products are provided for information only and do not constitute endorsement, express or implied, by Sue Cortese.